

Community Panel
The Community Panel is the daily operational hub for building managers and community staff. It centralizes everything from visitor reception and support tickets to bookings, lead management, and physical access card distribution.
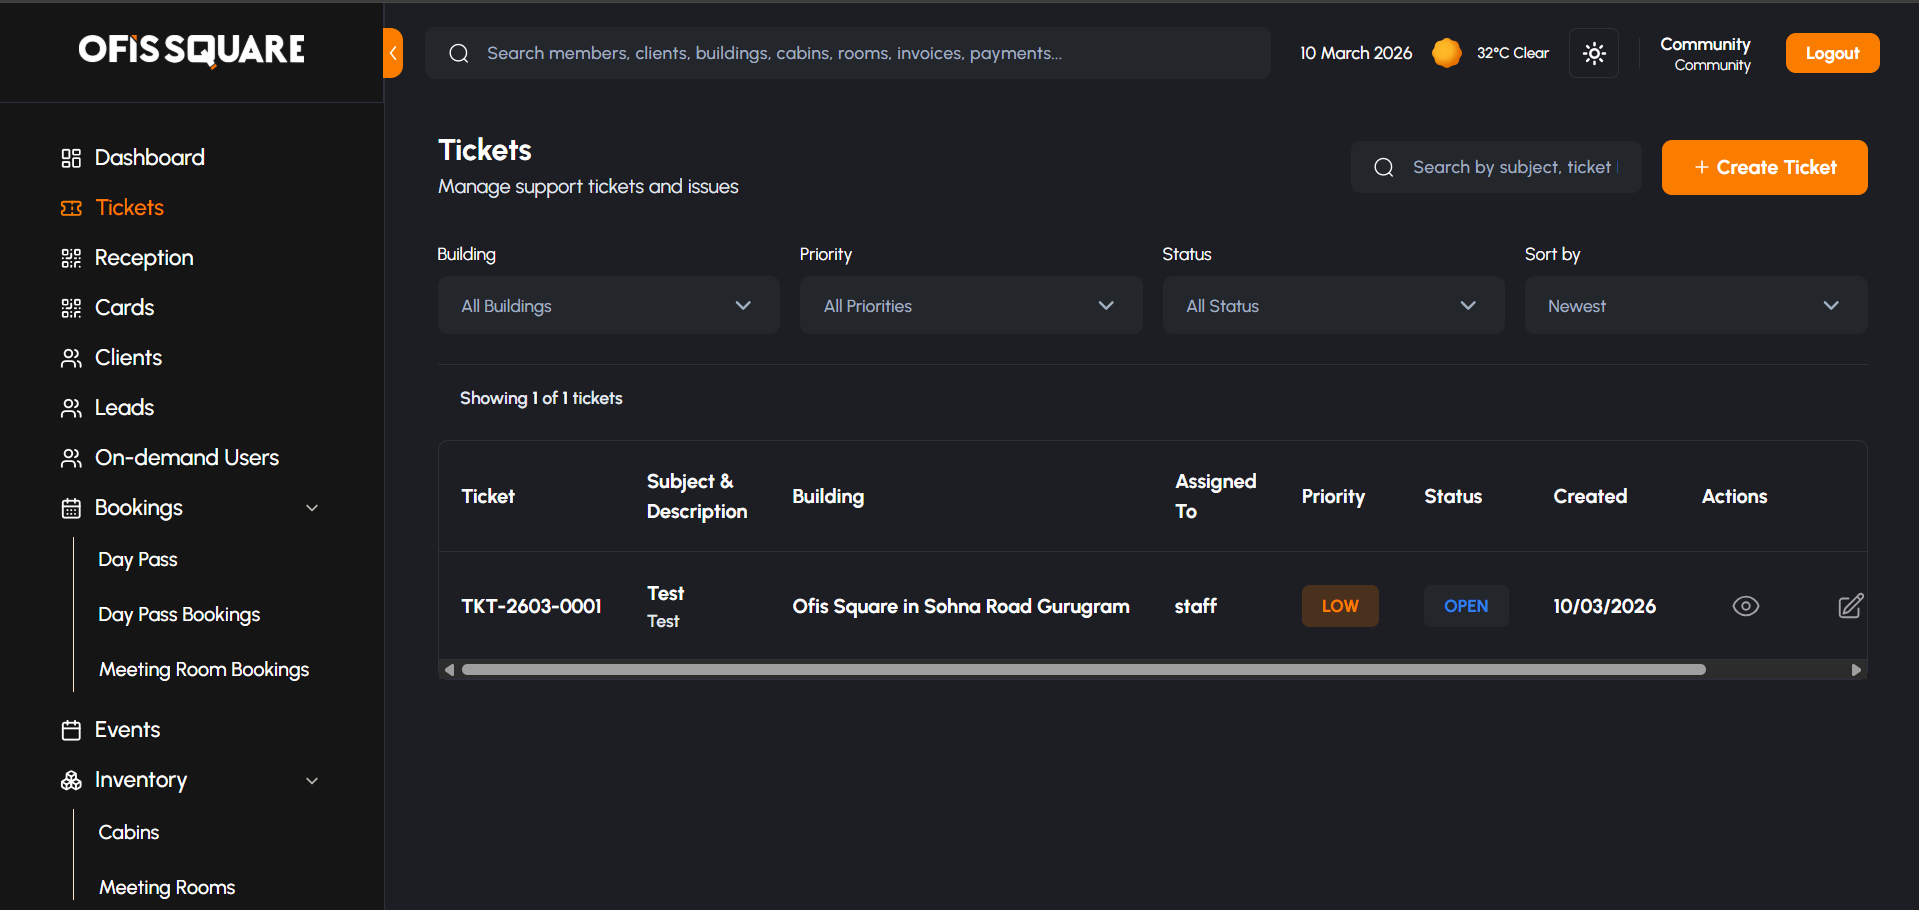
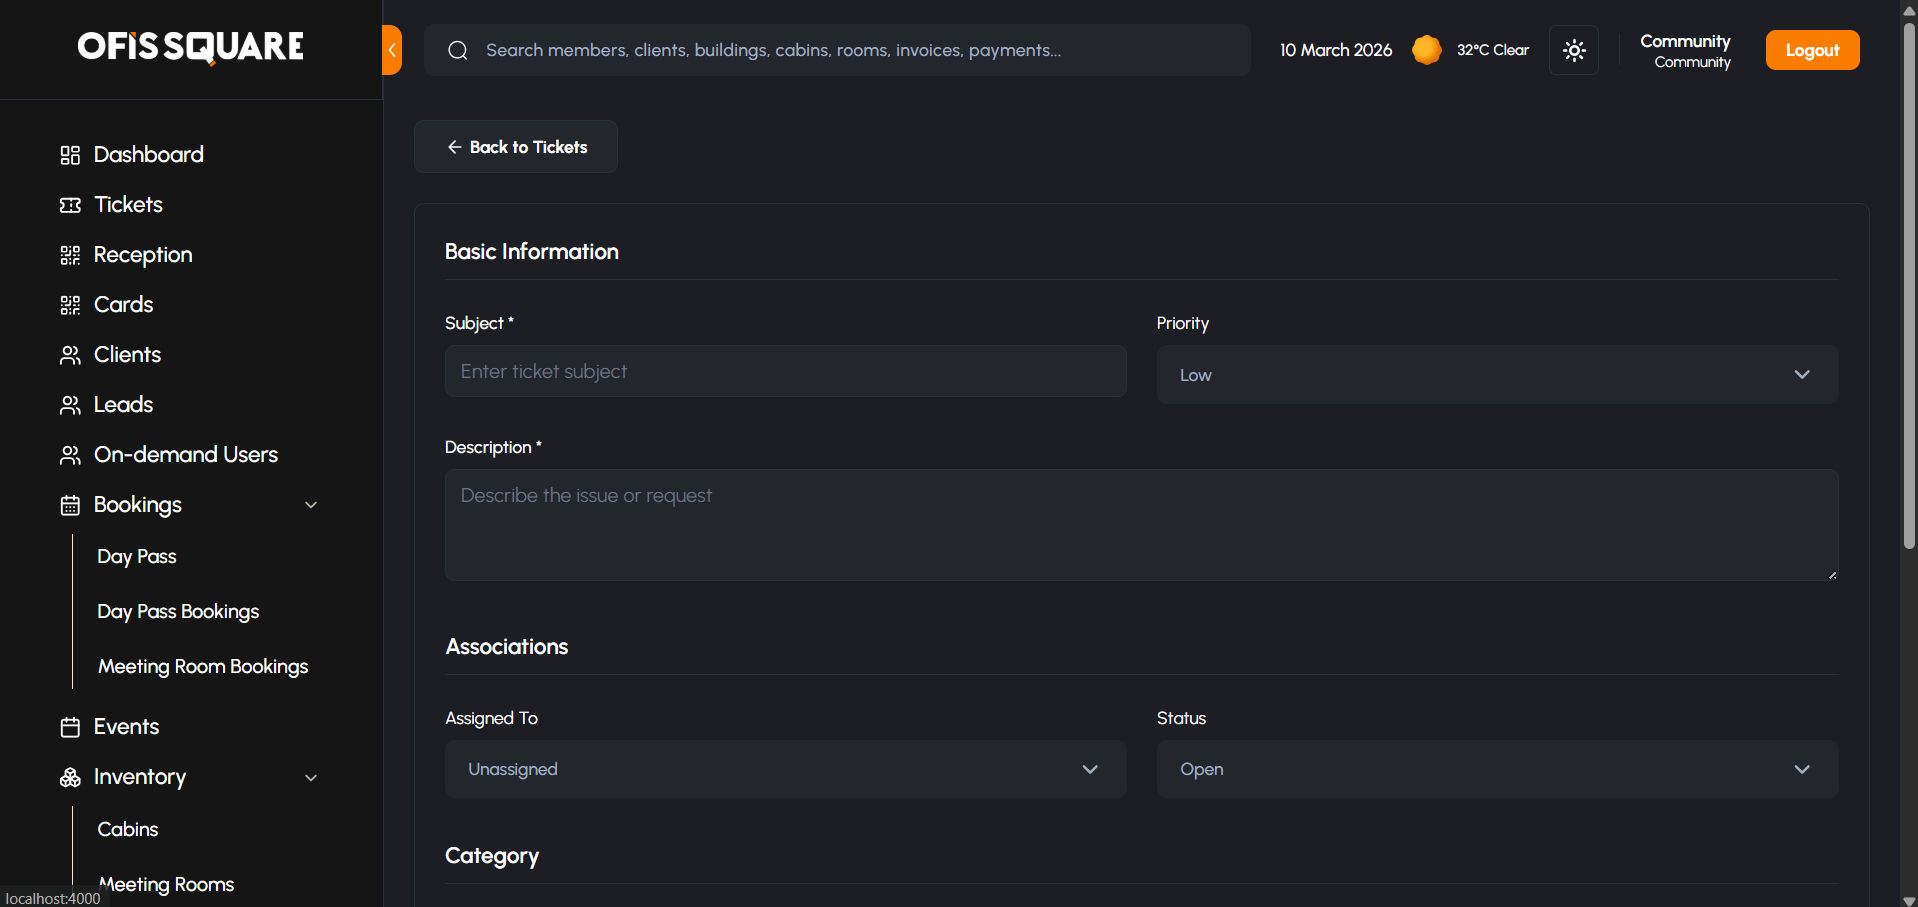
Helpdesk & Support (Tickets)
- Name
Building Ticket Queue- Description
Community Managers can view all support tickets raised specifically for their assigned building, from IT issues to housekeeping.
- Name
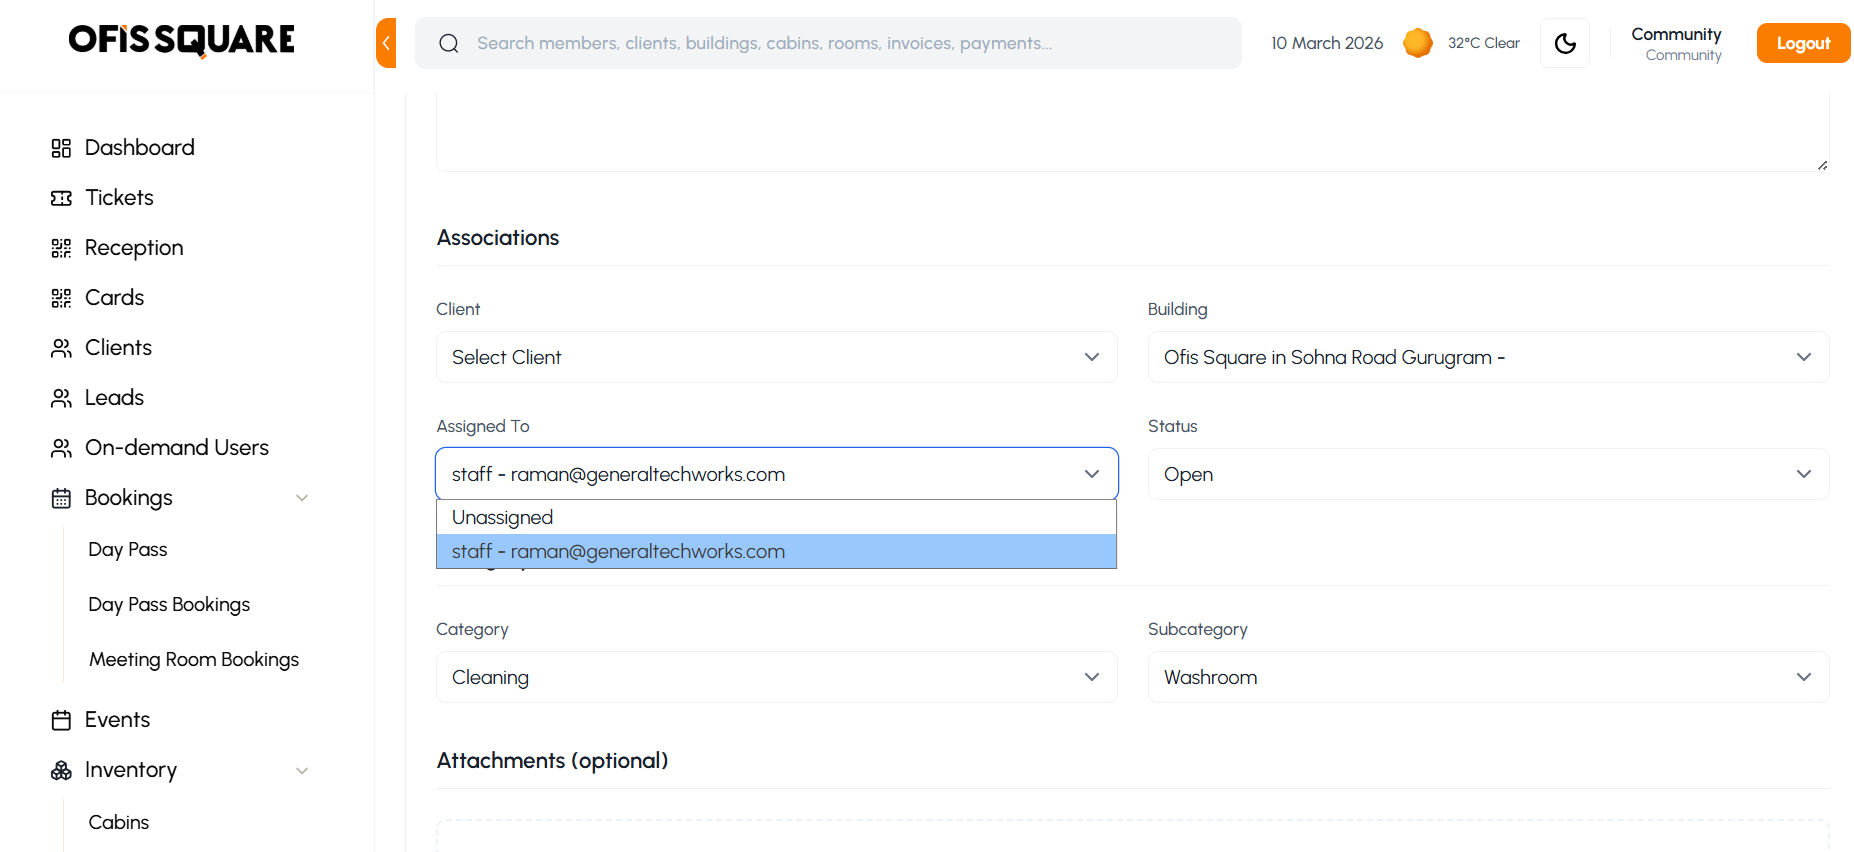
Staff Assignment- Description
Tickets can be directly routed and assigned to specific on-ground staff members (like maintenance or IT) for rapid resolution.
- Name
Escalation & Status Flow- Description
Managers have full control to escalate severe issues and manually alter the status of any ticket (e.g., Open, In Progress, Resolved) to keep members informed.
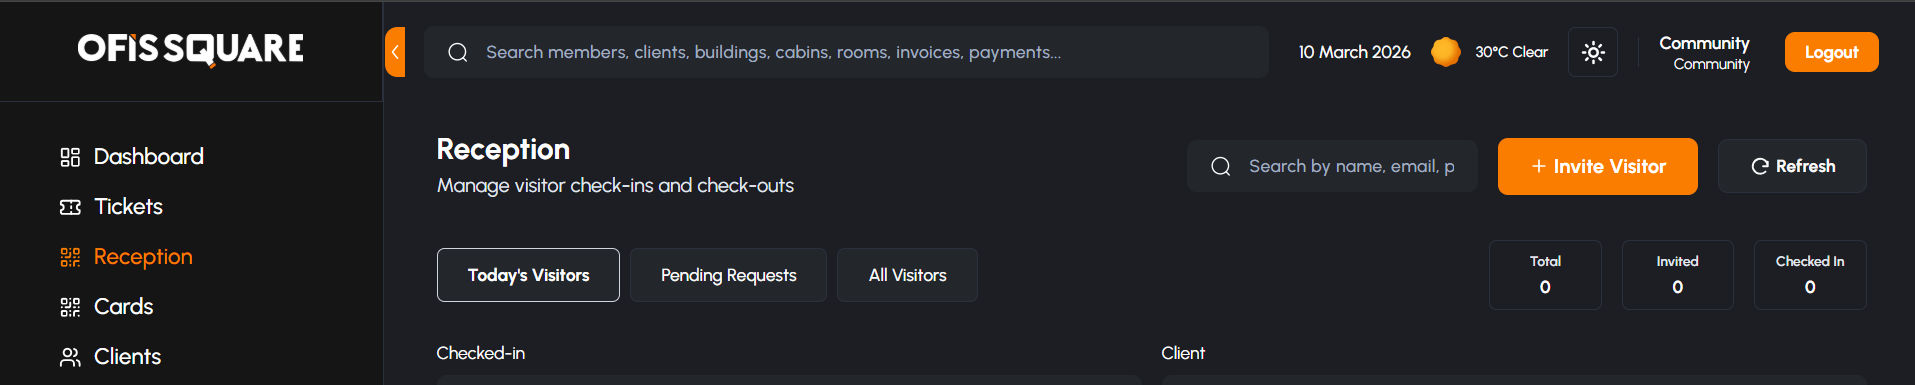
Reception & Visitor Management
- Name
Visitor Tracking- Description
The Reception dashboard offers a live feed of all expected visitors arriving today, complete with date-wise historical and future filters for long-term tracking.
- Name
Host Notifications- Description
When a visitor arrives, the front desk can trigger an automated notification to the host member. The host uses the member app/panel to officially approve the visitor.
- Name
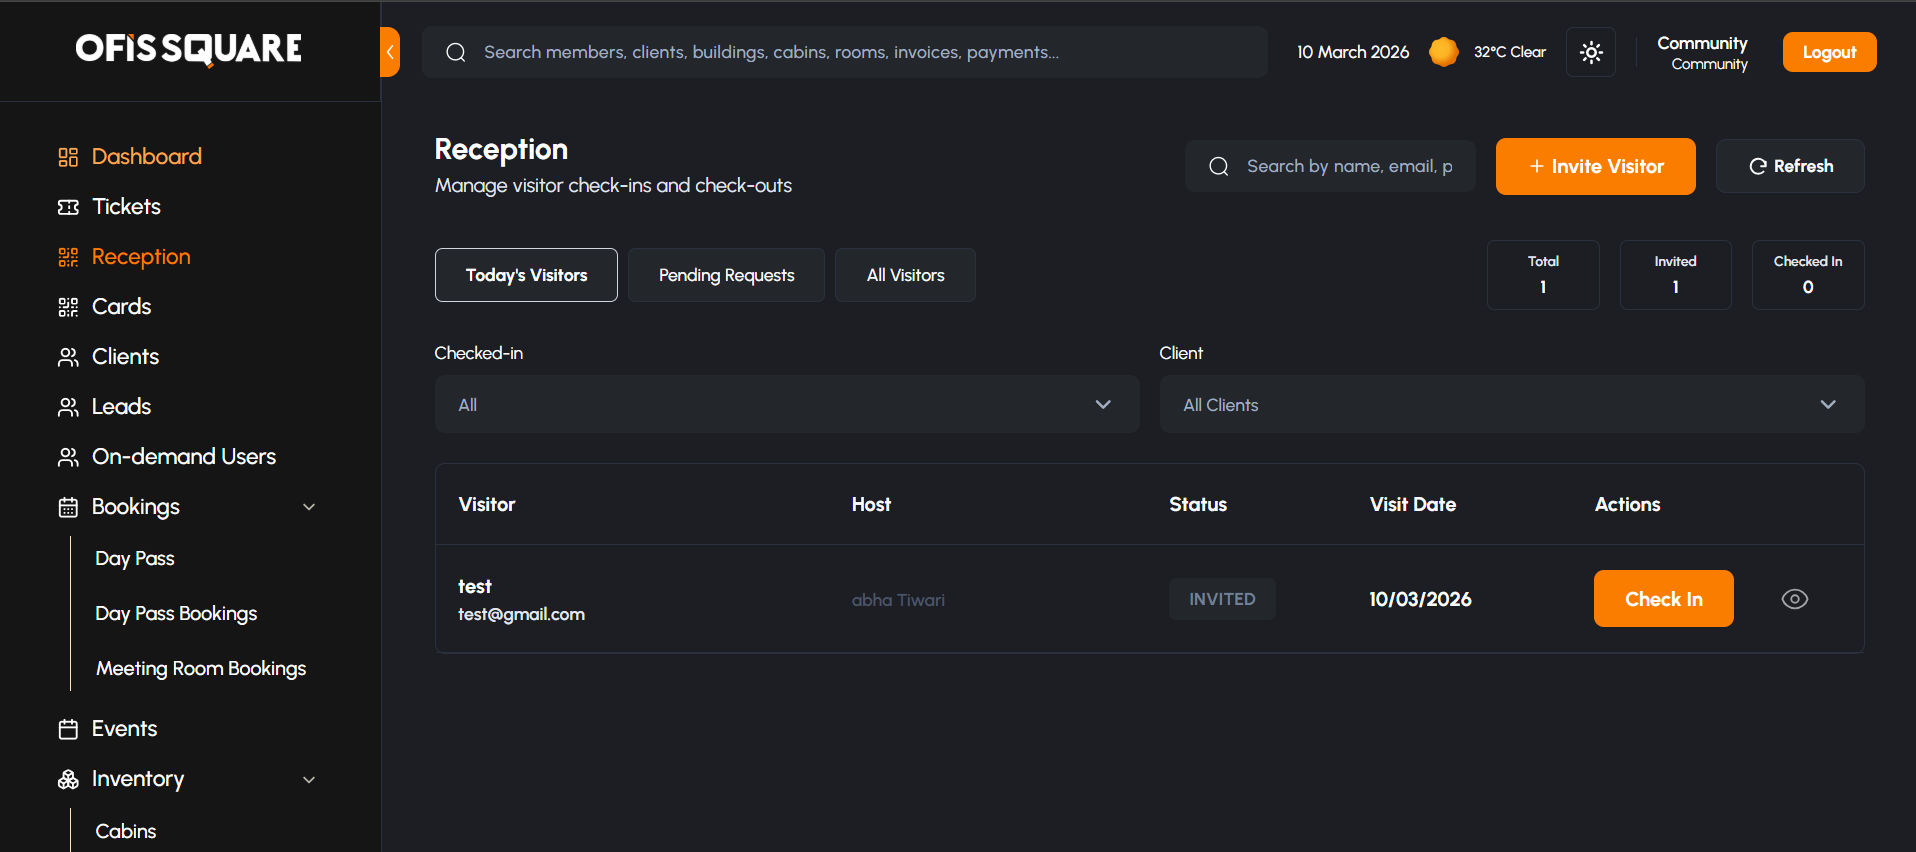
Check-In / Check-Out- Description
Upon host approval, the front desk processes a successful check-in. The system captures exact, time-stamped check-out data when the visitor leaves.
- Name
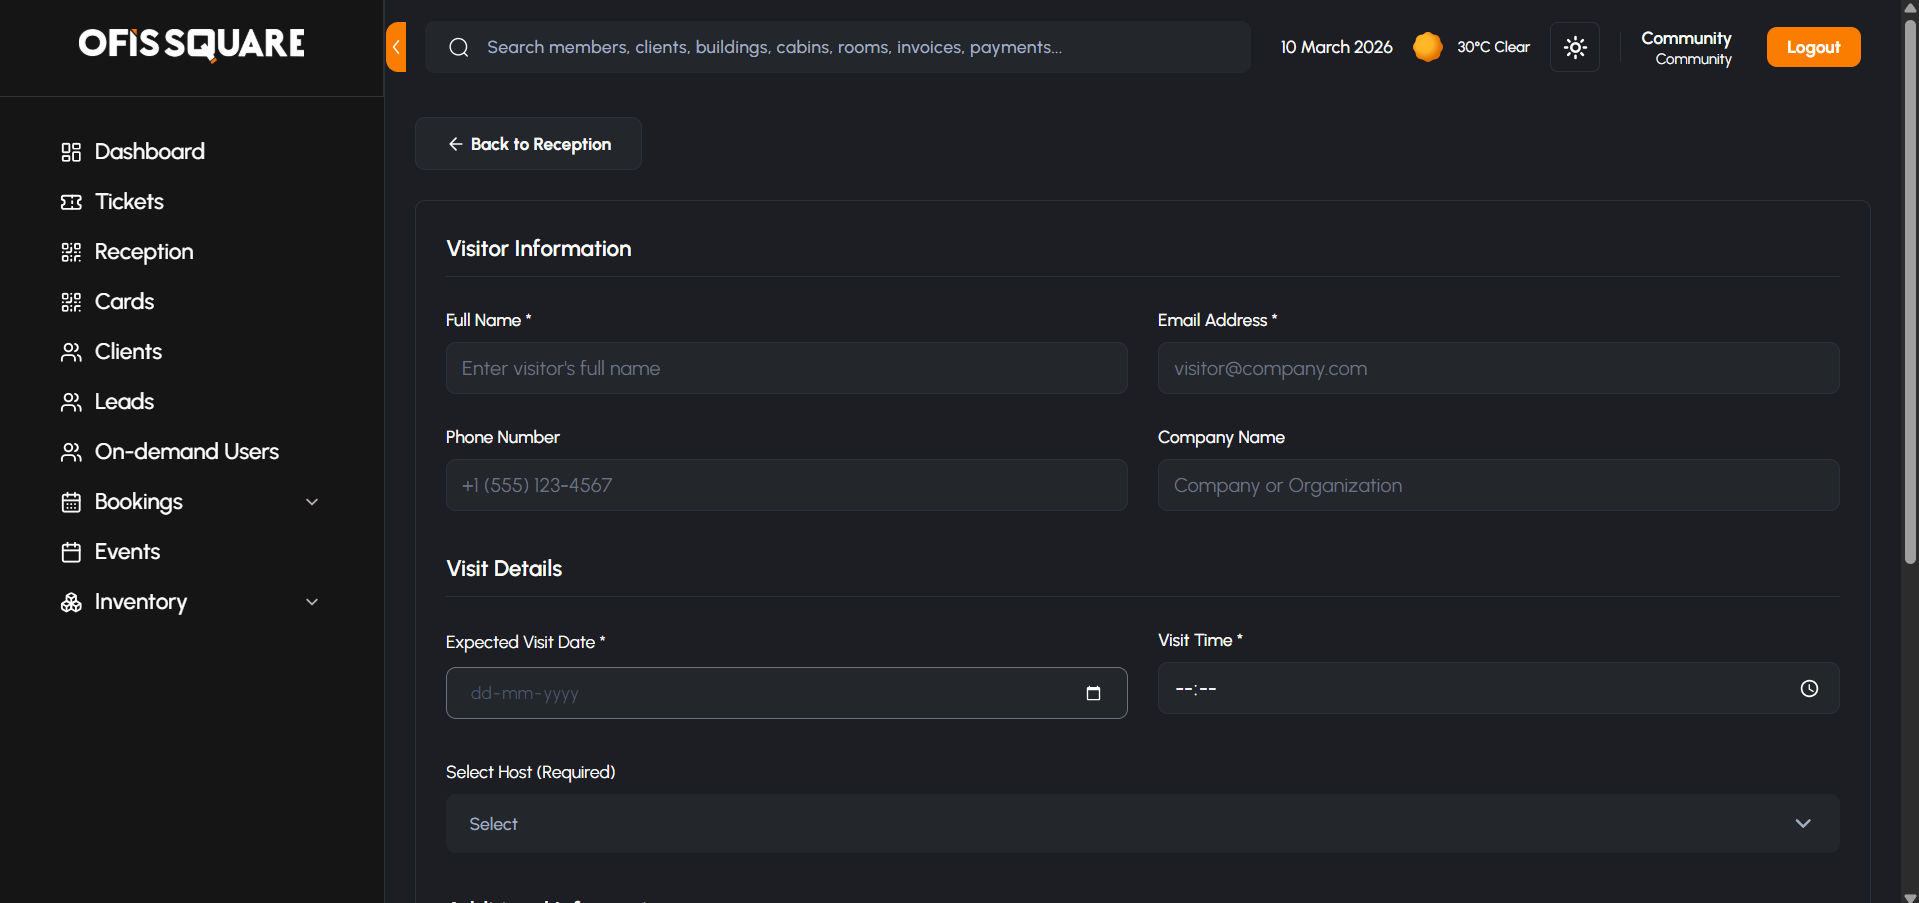
Invite a Guest- Description
Staff can pre-register visitors on behalf of members using a comprehensive invite form capturing: Full Name, Email, Phone, Company, Expected Visit Date & Time, Assigned Host Member, Purpose of Visit, and Notes.
Access Control (Cards)
- Name
Client Card Distribution- Description
The Community team can distribute batches of physical access cards to a parent Client via a simple CSV import process. The client administrator then manages assigning those specific cards to their individual employees.
- Name
RFID Import- Description
Bulk upload new RFID card databases into the platform via CSV, making them immediately available for assignment.
Clients & Members
- Name
Profile Directory- Description
Complete visibility into all registered Client organizations and the individual Members associated with them within the building.
- Name
Financial Visibility- Description
When a verified Community Manager is logged in, the system securely surfaces any outstanding financial amounts associated with a client or member, aiding in collections and billing support.
Lead Management & Onboarding
- Name
Lead Verification- Description
Managers can view incoming leads, read their specific workspace requirements, and securely review and approve uploaded KYC documents to finalize their onboarding.
- Name
Manual Lead Creation- Description
Staff can manually inject walk-in leads into the system using a dedicated form capturing: First Name, Last Name, Company, Address, Pincode, Email, Phone, Employee Count, and their core Purpose (Coworking, Day Pass, Private Office, etc.).
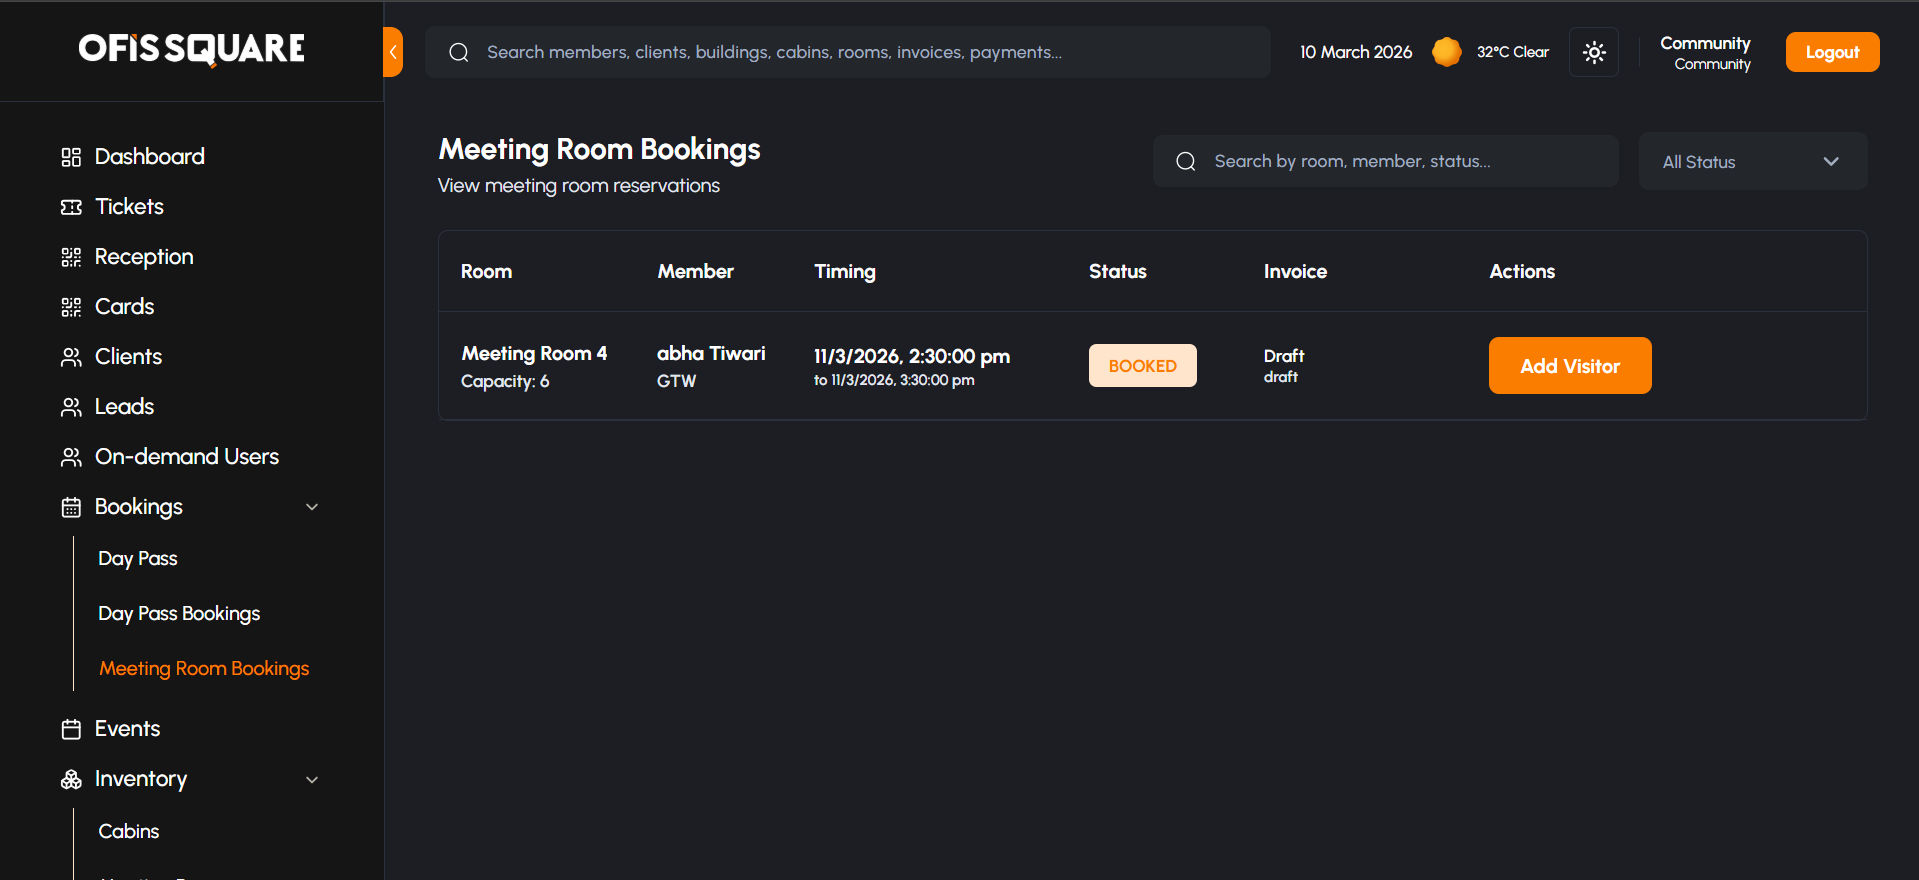
Bookings & Reservations
- Name
Booking Overview- Description
A centralized hub tracking all Meeting Room and Day Pass reservations taking place in the building.
- Name
Temporary Access Cards- Description
For external guests or members booking specific Day Passes or Meeting Rooms, staff can temporarily assign physical access cards directly against their active booking record.
- Name
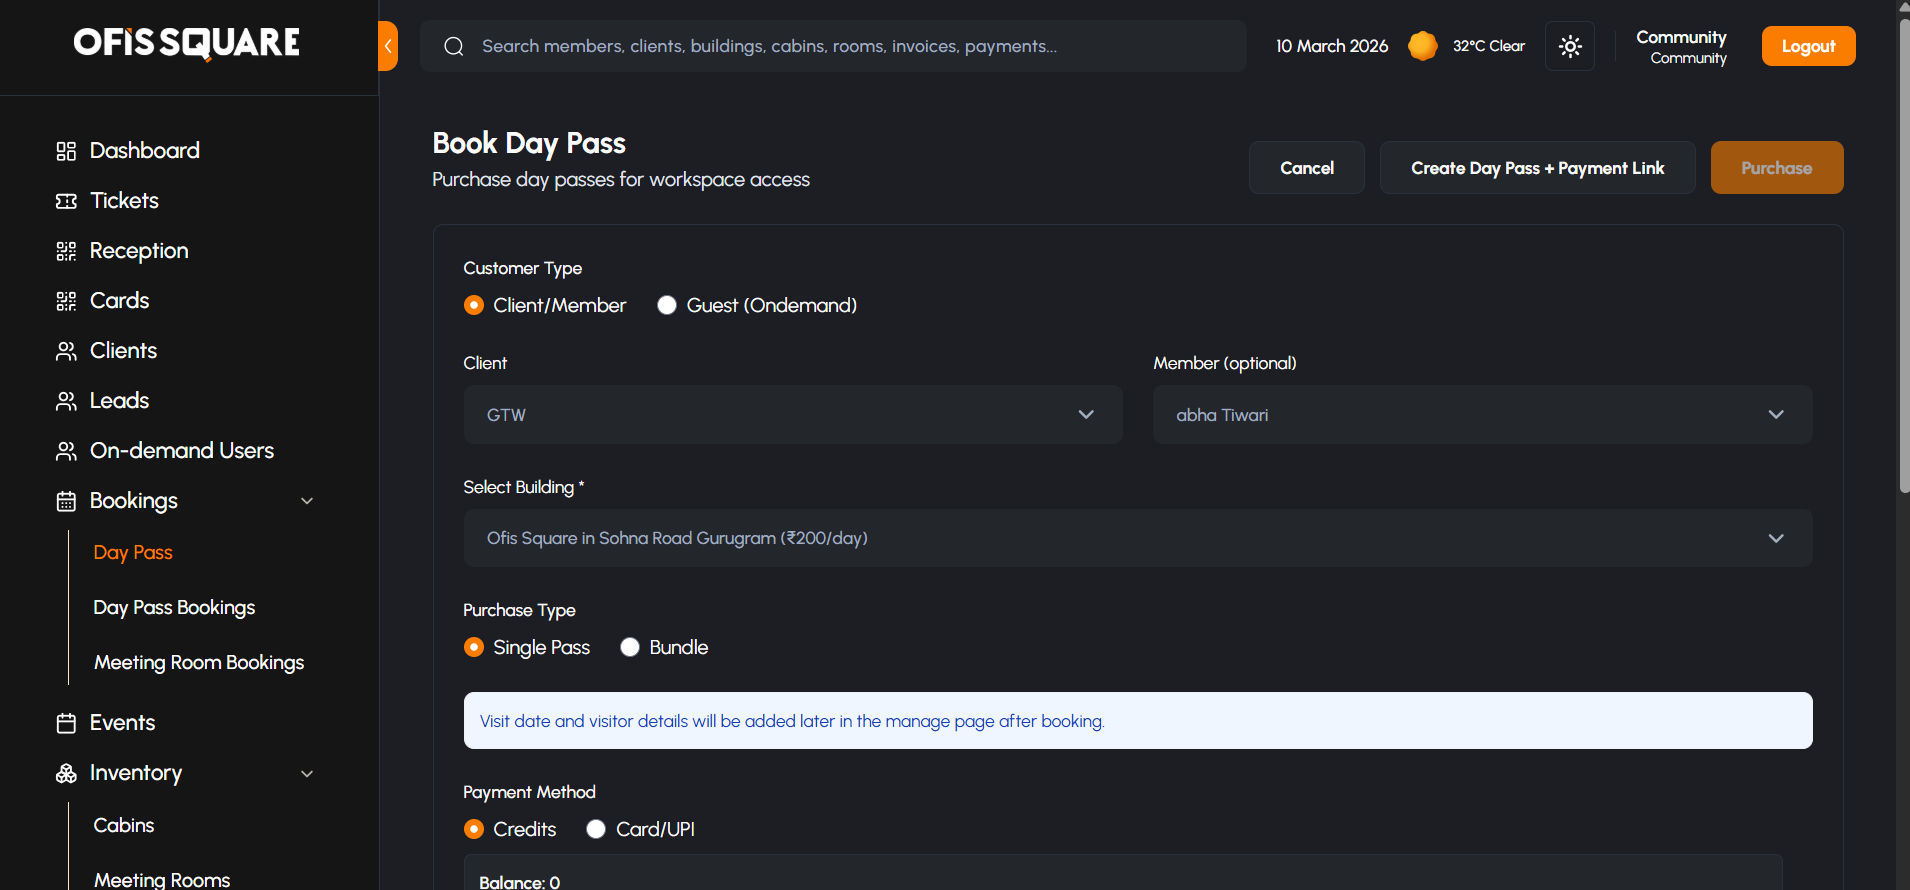
Creating Day Pass Bookings- Description
Community Managers can manually book and assign Day Passes for both existing Clients and temporary On-Demand users directly from the panel.
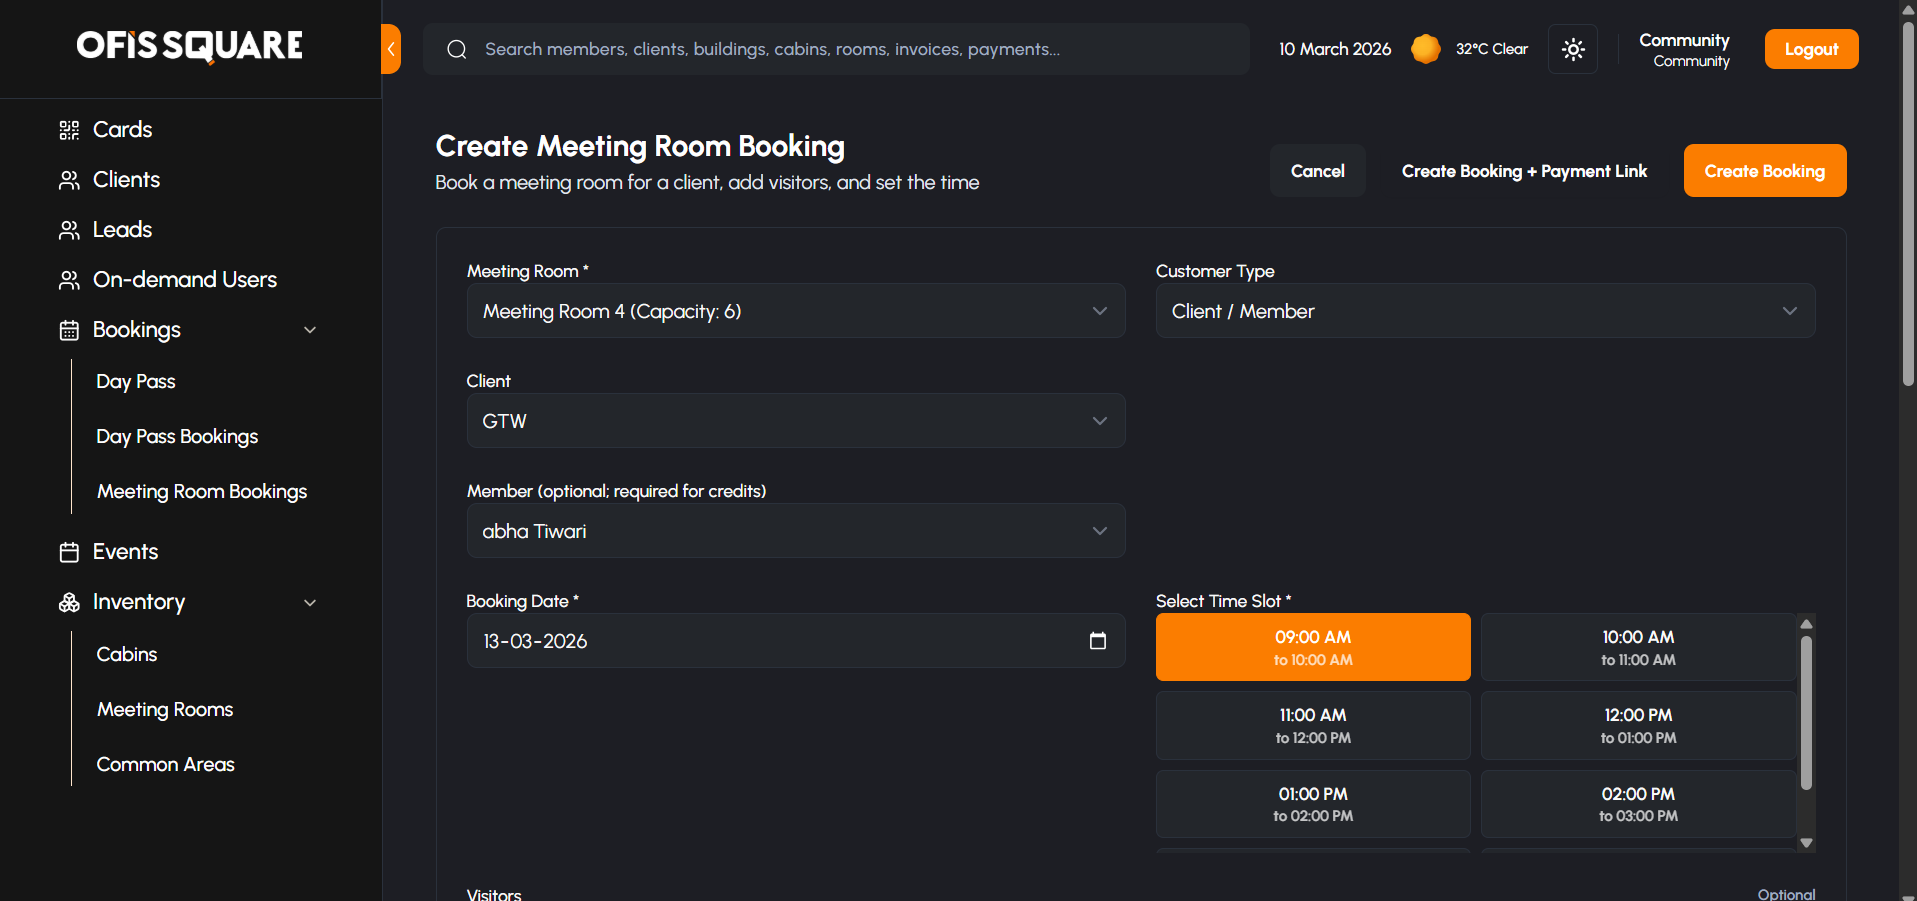
- Name
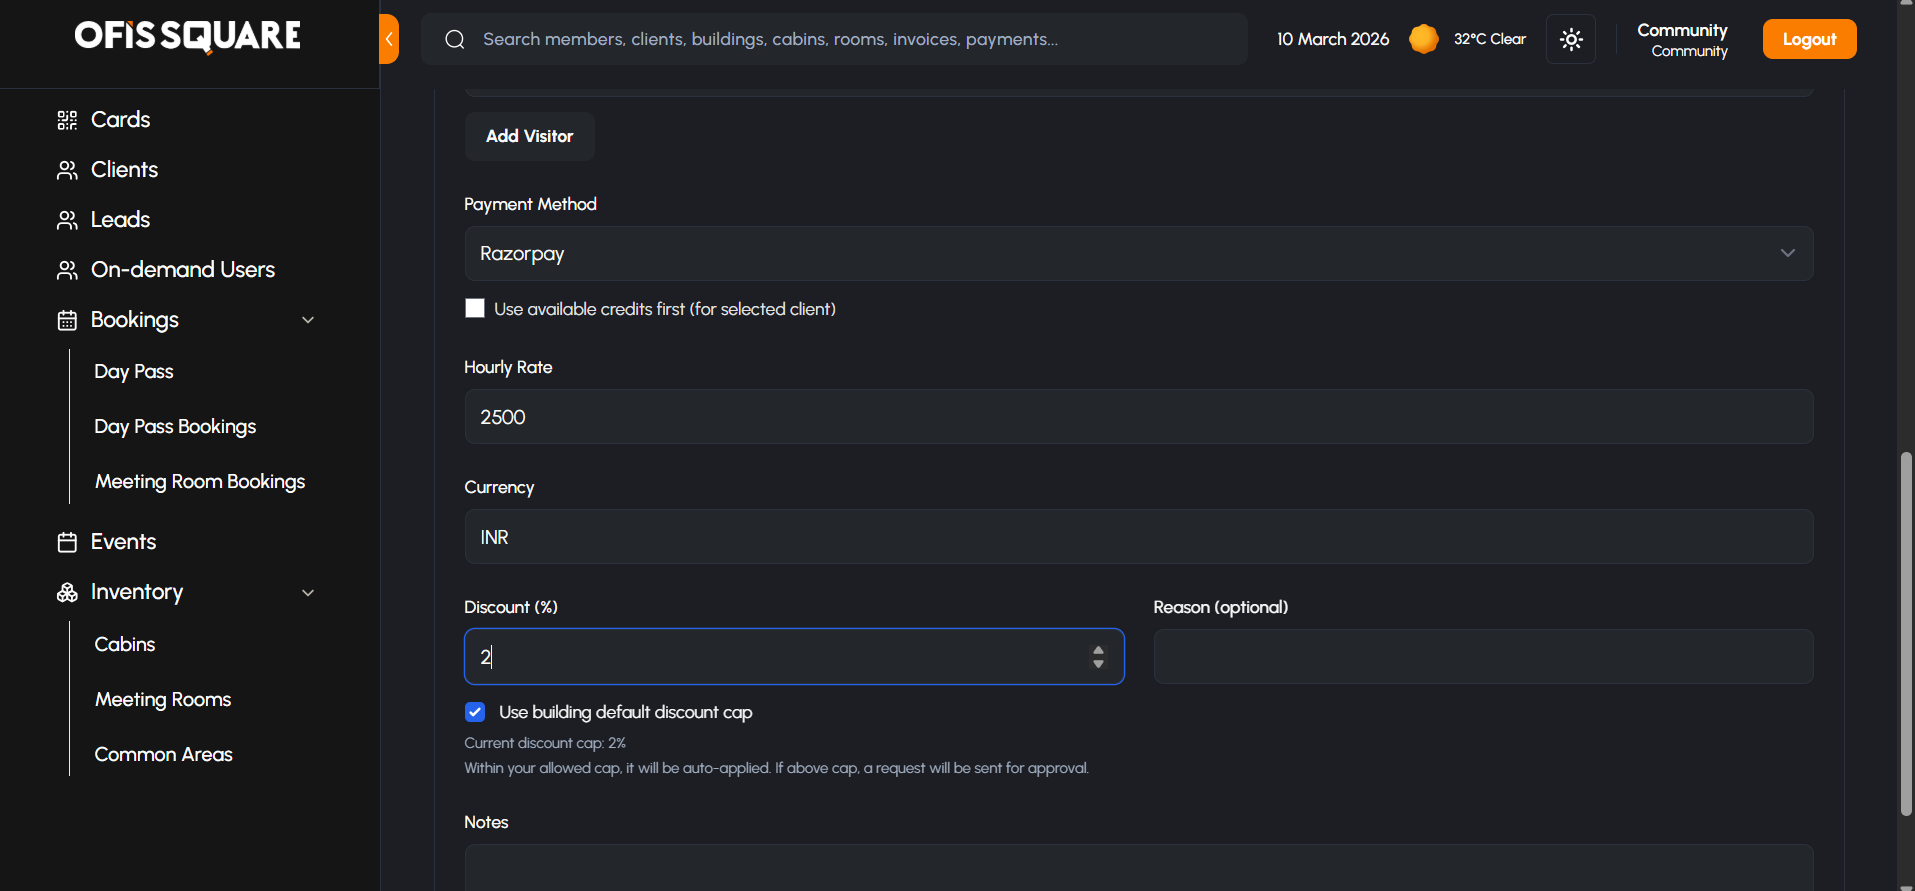
Meeting Booking & Discount Rules- Description
Staff can create Meeting Room bookings on behalf of members. The system grants Community Managers the authority to apply financial discounts up to a strictly defined threshold. If a discount exceeds this threshold, the booking enters a "Pending Approval" state until a Super Admin officially authorizes the larger discount.
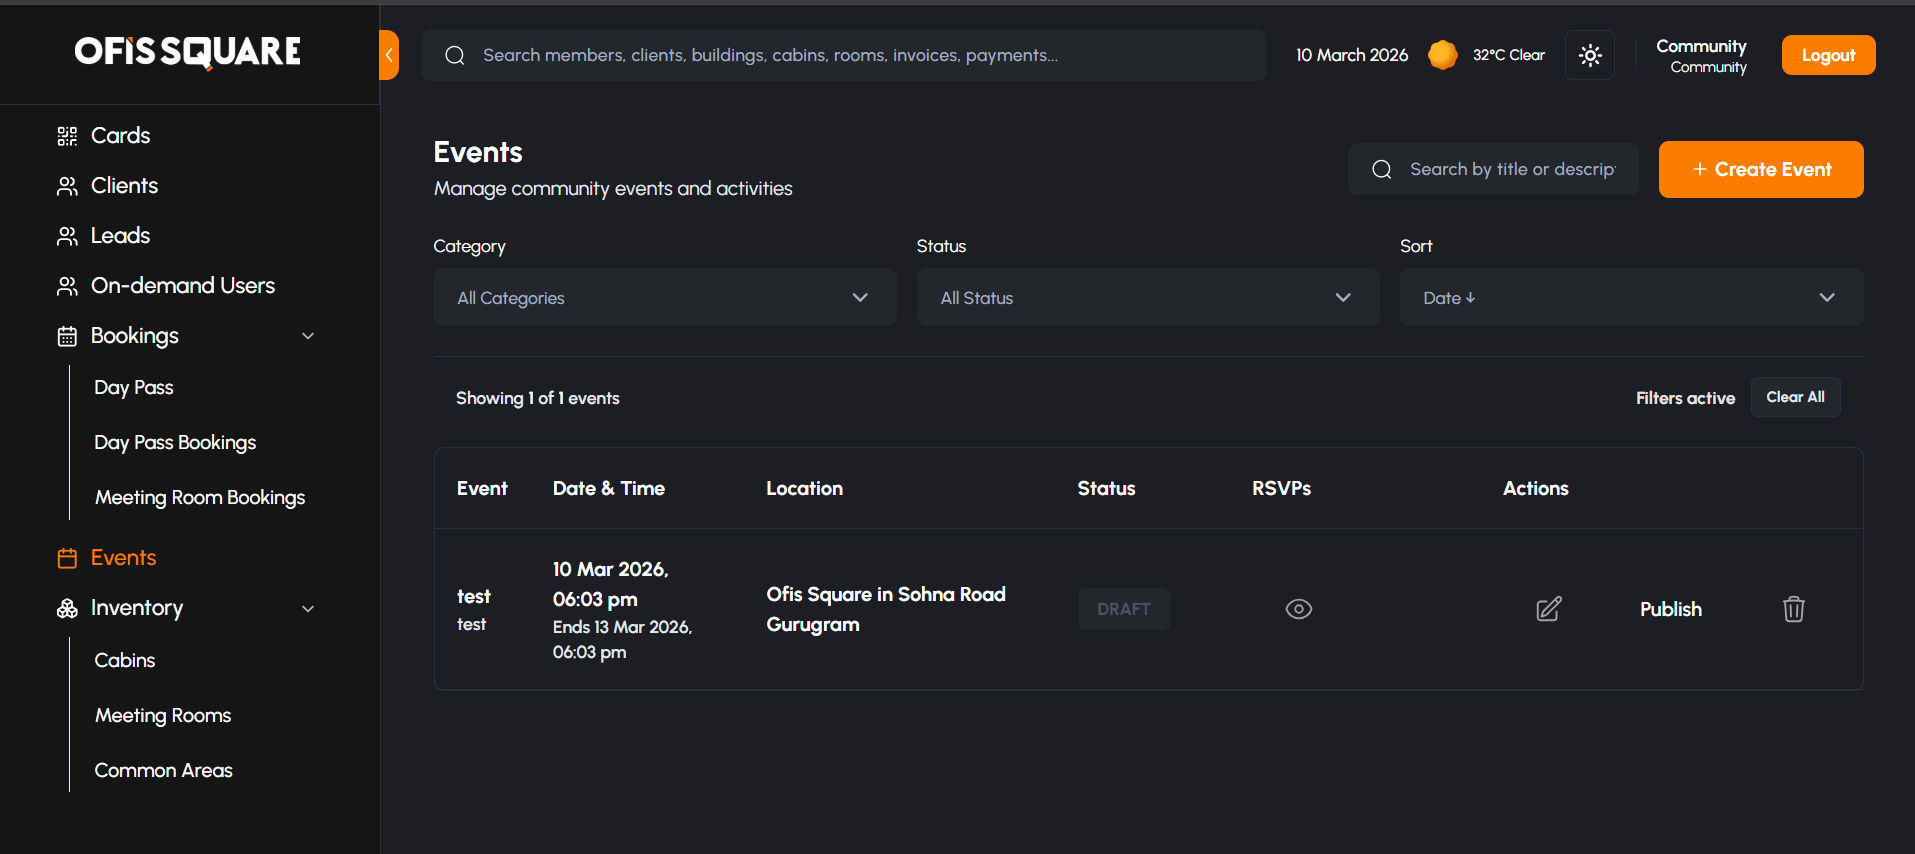
Events Management
- Name
Community Events- Description
Staff can conceptualize and create networking or social events directly from the panel. They have full control to edit event details, publish them to the Member Web Panel, and track live member RSVPs.
Asset & Inventory View
- Name
Inventory Tracking- Description
Provides Community Managers with a read-only, high-level overview of the physical inventory within the building, allowing them to track assets without accidentally altering core baseline data.
Step-by-Step Operational Workflows
Below are the detailed, step-by-step guides for the most common administrative tasks performed by Community Managers on the panel.
1. The Visitor Management Flow
- Pre-Registration (Staff Invite): If a member hasn't invited their visitor yet, the front desk can do it for them. Navigate to Reception -> Invite Visitor and fill in the following fields:
- Full Name
- Email Address
- Phone Number
- Company Name
- Expected Visit Date
- Visit Time
- Select Host (Required)
- Purpose of Visit
- Additional Notes
- Notification Trigger: An email invitation with a QR check-in code is immediately dispatched to the visitor upon form submission.
- Arrival & Check-In: When the visitor arrives at the front desk, the Community Manager verifies them on the live Reception dashboard (which shows all expected visitors for the day). They click Check-in.
- Notification Trigger: A real-time notification (app push/email) is instantly sent to the Host Member announcing their guest's arrival.
- Host Approval & Meeting: The Host Member uses their app or web panel to "Approve" the visitor, signaling the front desk to let the visitor through.
- Check-Out: When the meeting concludes and the visitor leaves, the front desk clicks Check-out on the dashboard. The system permanently captures the exact checkout timestamp for physical security records.
2. Resolving a Support Ticket
- Monitor the Queue: The Community Manager opens the Tickets dashboard. Here, they can see all submitted issues exclusively for their assigned building, categorized by type (IT, Housekeeping, etc.).
- Review & Assign: The Manager clicks on an "Open" ticket to read the member's description and view attached photos. If the issue requires physical intervention, the Manager assigns the ticket to a specific on-ground staff member (e.g., a maintenance technician).
- Notification Trigger: The assigned staff member receives a notification regarding their new task.
- Status Updates: As the staff works on the issue, the Manager changes the ticket status from Open to In Progress.
- Notification Trigger: The member who raised the ticket is immediately notified of the status change.
- Escalation or Closure: If the issue is severe and cannot be resolved locally, the Manager can Escalate it. Once the issue is fixed, they change the status to Resolved, closing out the ticket with the member.
3. Booking a Meeting Room (with Discounts)
- Initiate Booking: Navigate to Bookings -> Meeting Rooms and click to create a new booking on behalf of a member. The manager must fill in the following fields:
- Select Client/Member
- Select Room
- Date
- Start Time
- End Time
- Number of Guests
- Apply Discretionary Discount: The Community Manager can apply a discount to the total price to secure a deal.
- Under Threshold: If the discount percentage is below the manager's authorized threshold, the booking is instantly confirmed.
- Over Threshold (Admin Approval): If the manager attempts to give a discount above their threshold, the booking enters a Pending Approval state.
- Notification Trigger: A request is sent to the Super Admin. The booking remains on hold until the Super Admin formally approves the excessive discount.
- Confirmation & Invoicing: Once the booking is confirmed (either instantly or post-admin approval), the reservation is booked into the calendar.
- Invoice Generation: An invoice is instantly generated against the Member's (or Client's) billing account in Zoho Books for the final discounted amount.
- Granting Access: The Community Manager can now utilize the Bookings dashboard to manage building access:
- Automated Provisioning: The system attempts to automatically create Matrix and Bhaifi credentials for any added visitors.
- Give Access Button: If automatic provisioning fails or wasn't triggered, a Give Access button appears to manually initialize the Matrix/Bhaifi setup.
- Card Assignment: Staff can temporarily assign a physical RFID Access Card strictly for the duration of this specific booking.
4. Booking a Day Pass
- Identify User Type: Navigate to Bookings -> Day Passes. The manager must fill in the following fields:
- Select User Type (Existing Client Member or New On-Demand Walk-in)
- Select Workspace Type
- Select Date
- Payment & Confirmation: Confirm the booking details.
- Invoice Generation: A Day Pass invoice is instantly generated in the financial system. Depending on the setup, this can either trigger an immediate payment gateway link or deduct from an existing corporate credit pool.
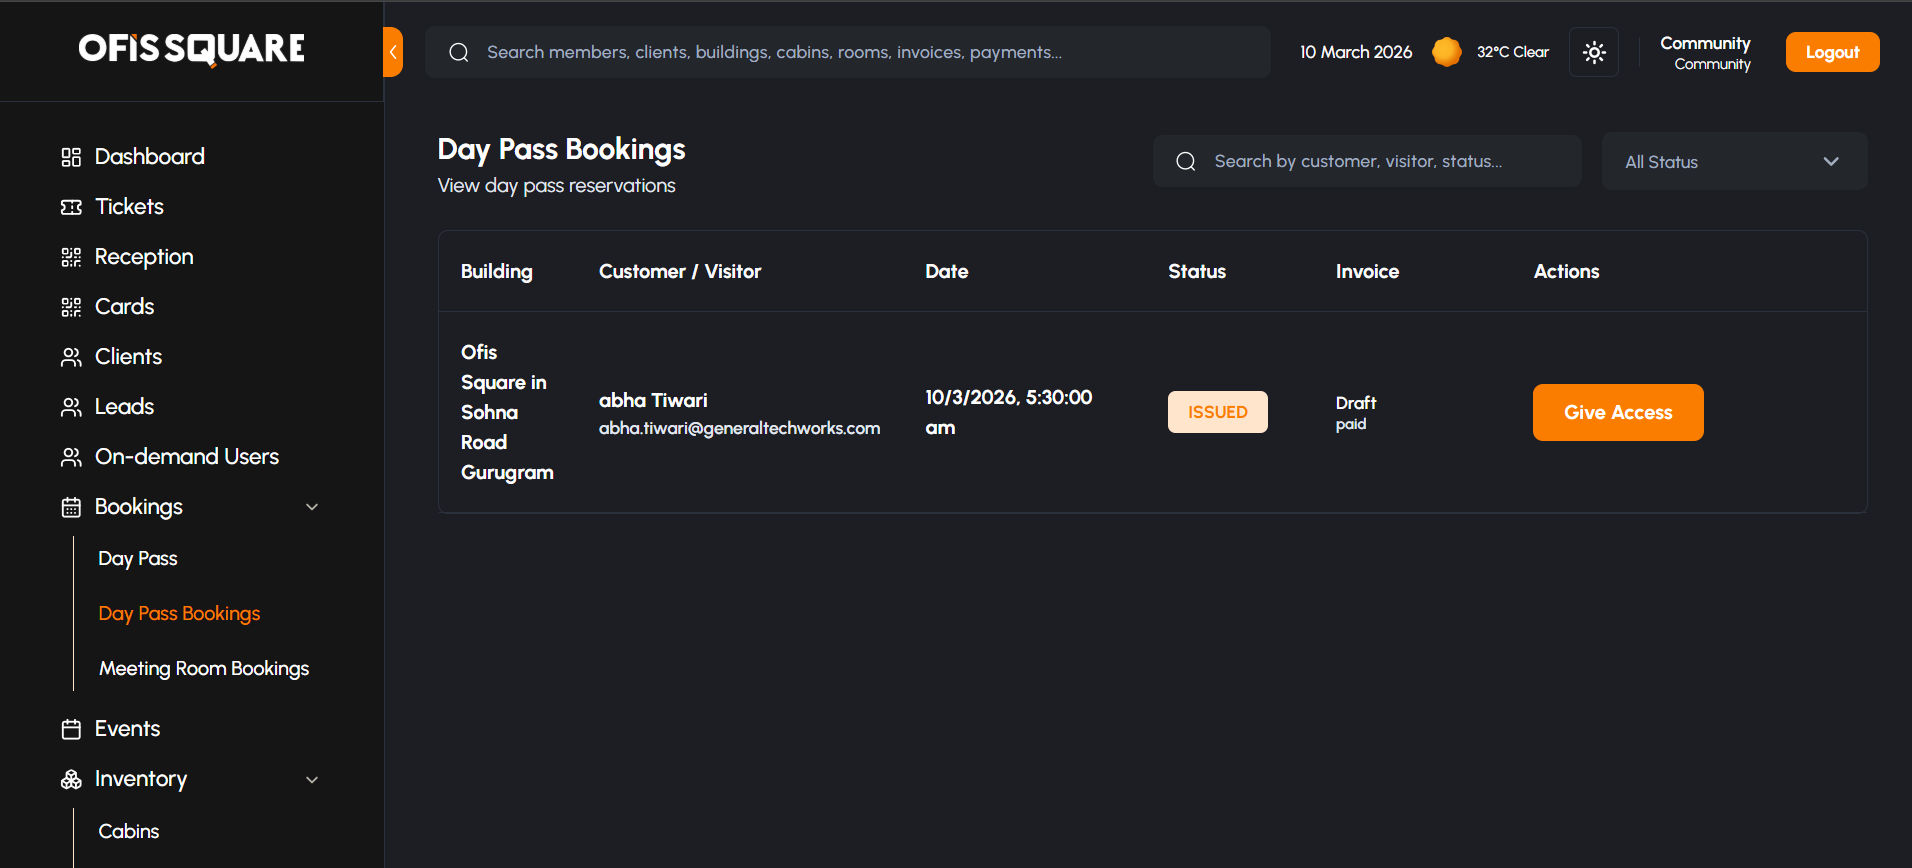
- Granting Access: Similar to meeting rooms, the Manager manages the user's facility access:
- Provisioning: A Give Access button is available if the automated backend provisioning (Matrix/Bhaifi) was not completed.
- Card Assignment: Staff can assign a physical access card to the user for the day, which will automatically deactivate when the pass expires.
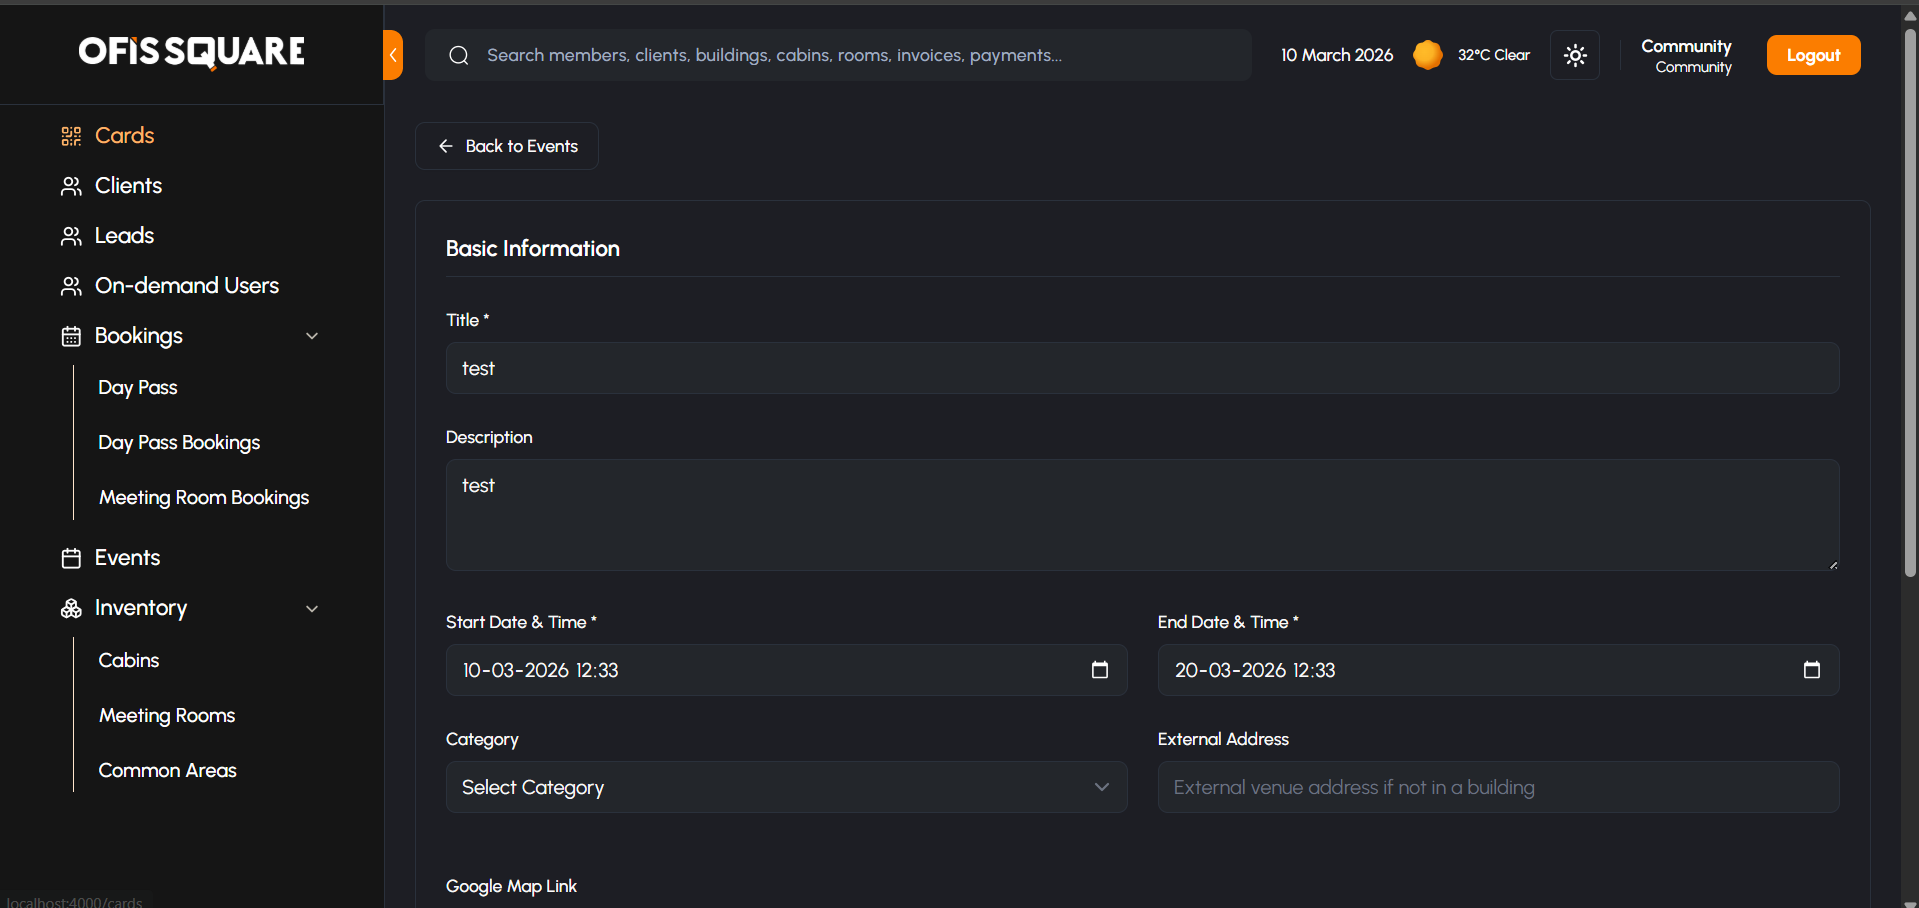
5. Managing Events
- Event Creation: Navigate to the Events module. Click Create Event and fill in the comprehensive details:
- Event Title & Description
- Date, Start Time, and End Time
- Location (Specific space within the building)
- Capacity Limit
- Cover Image or Banner
- Publishing: Once the details are finalized, the Manager clicks Publish.
- Visibility: The event instantly becomes visible on the Member Web Panel and mobile app for all active members in that specific building.
- Notification Trigger: An automated email broadcast can be triggered to invite members.
- RSVP Tracking: Members use their app to RSVP. The Community Manager can monitor the live attendee list from the dashboard to prepare catering and seating accordingly.
- Day-of-Event Check-In: During the event, staff can use the attendee list to manually check in members as they arrive, ensuring capacity limits are respected.
6. Managing New Leads & Identity Verification (KYC)
- Manual Lead Creation: If a prospect walks into the building without signing up online, navigate to Leads -> Create Lead. The staff must fill in the comprehensive standard lead fields:
- First Name
- Last Name
- Company Name
- Address
- Pincode
- Phone
- Number of Employees
- Purpose (e.g., Coworking Space, Day Pass, Meeting Room, Private Office, Virtual Office, Event Space)
- Automated Routing: Upon saving the form, the system automatically routes the profile based on the selected Purpose (e.g., provisioning an 'ondemanduser' account for immediate needs).
- Notification Trigger: A welcome email containing initial login instructions is dispatched to the prospect.
- Verifying KYC Documents: The prospect logs in and uploads their identity documents.
- Admin Approval: The Community Manager opens the Leads dashboard to find the profile now marked as "Pending Review". The manager securely inspects the uploaded file.
- Finalize: The manager clicks Approve, officially converting the lead into a verified operational profile. If the document is invalid, they hit Reject.
- Notification Trigger: The prospect receives a notification either confirming their approval (granting them full facility access) or explaining the rejection reason and prompting a re-upload.